Making a Wizard's Wand: Party Favors

Wizard's Wand
My Sister announces a "Harry Potter" themed wedding
My Sister had some happy news one day. She was getting married. Not only was she getting married but they had decided that they were going to do a themed wedding. My sister has always been good at "theming" things up.
For her wedding she decided that they should do a "Harry Potter" theme. This was great because she was going to have everyone sorted into the four houses or a separate "muggle" section. The wedding would take place a rail-station, to be decorated much like the Hogwarts express.
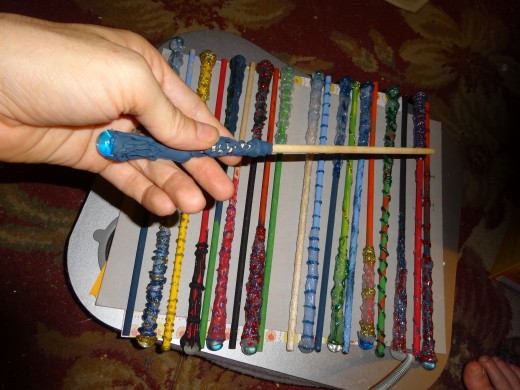
Now as she is planning all this fun, including amazing invitations much like the marauder's map, She has decided to give out wands as a wedding favor.
She has about 150 participants invited to her wedding shindig. So How do you easily make wands for that many people? Along with keeping a budget from exploding at the seams?
Material
Ingredients
- 1 Dowel, At least 12" in length
- Assorted Hot glue sticks, Clear and or colored.
- 1 Hot glue gun, I use high temp, but low temp is fine.
- 1 Bag assorted gems, These are like flat marbles
- Assorted Bottles of Craft paint, Your choice of colors

Preparations for making a wand
There is a pretty easy and fun way to make wands. Myself and my wife have now made 20 of them in a couple days and even though my sister now has enough of them we might make one or two more...for us.
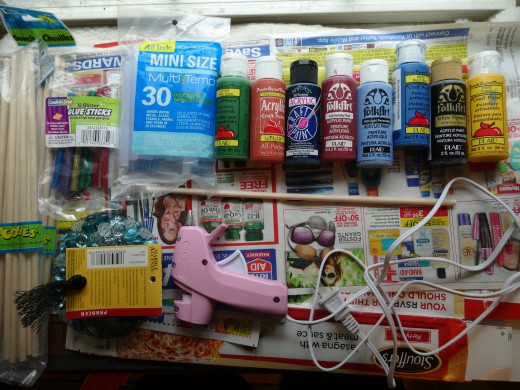
We price shopped around and found Amazon had a lot of the product. Any craft store or hardware store will also have the product, but I found the dowels to be the best price on Amazon so I ended up getting the rest of the supplies there too.
So I purchased some 12" dowels, along with hot glue sticks ( a bag of clear and a bag of assorted glitter colors) and gem marbles (Glass marbles that are flat on one side.) I already owned a hot glue gun and a few bottles of craft paint (acrylic paint).
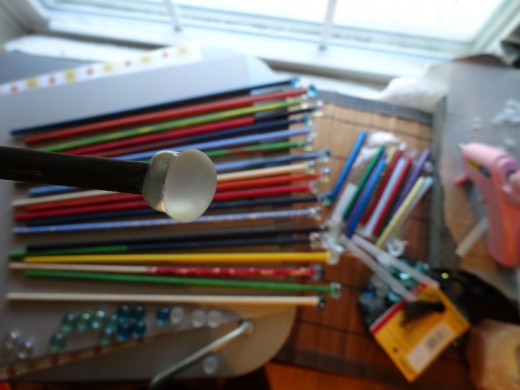
Base coat and add the gem
Layer the handle with hot glue
And so we make a wand
- First we prepped all the dowels we were making by painting them with the under color. This will be the color of the wand part and any part of the wand that will show through the handle. You do not have to do this part if you want a plain unfinished wood look. You can also wait and paint everything at the end.
- Once we painted all the dowels, I hooked up the hot glue gun and attached a gem to the bottom of each of the wands. I dabbed a spot of hot glue onto the end of the dowel and then placed the gem on. I then put a string of hot glue around the edge of the gem to help secure it and prep it for the beginning of the handle base.
- You can either hold the wand until the glue dries. It takes a couple minutes. Or you can set them down on a surface to dry. I cut an empty paper towel roll in half and put little notched in it to help hold the stick still. This works for the gem part but for the next step you will have to either have a piece of wood with a hole in it to stick the wand end in while the glue dries or put it on a cookie wrack.
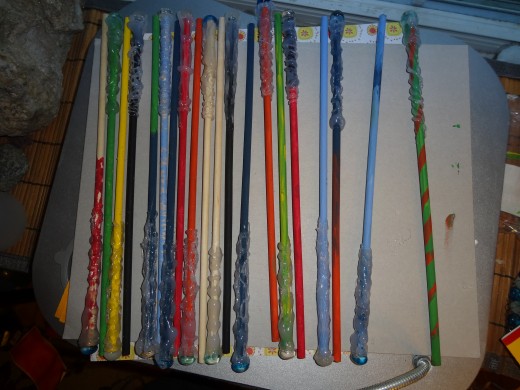
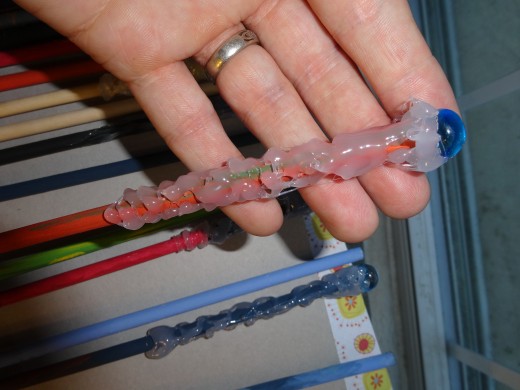
- Once all the gems are attached You can start adding the hot glue to build up the base. I used clear to build up the bulk of the base. You can dab drops on, or swirl it on, or just about any technique you want. I tried a different style each time. One of them I swirled on trying to make it look like wood. Depending on whether or not you want a specific pattern you can let the glue cool a little between building up the handle, or layer it on while it is hot to have it blend in to make a solid area. I used a Popsicle stick on a couple to smooth the glue around as it dried to give it a more controlled texture.
- After I build up the handle enough with the clear hot glue I can either set it aside to be painted or I can add some of the glitter color glue, using the same process that I used with the clear. I even tried creating little glue ringlets by squeezing the trigger and lightly swirling the gun before letting the glue touch the destination. (Don't worry about the little strings hot glue guns sometimes create, they can be pulled off later when the glue is dry).
- When I have enough hot glue on the handle. I stick the wand either on a drying wrack to cool more, or into a piece of wood. While the glue is still a little hot you can flatten the work you just did if you just set the wand down.
- Painting the wand is simply just using whatever color you want and painting it on. I almost think the best wands are the one I just built up with clear glue and then painted with the paint.
- After it is painted and dry you are done, unless you want to seal it with an acrylic sealer. I did not do this but you can if you want it to last at its longest capability.
- Feel free to add gems and even a star to the top if you want to make a fairy wand.


